How to Create a 3D Audio Visualizer Using Three.js
Last updated on 15 Dec, 2024 | ~13 min read | Demo
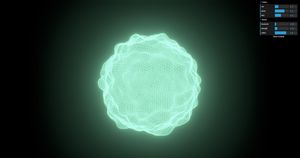
In this article, we'll create an impressive glowing audio visualizer by combining powerful tools and techniques, including Perlin Noise and post-processing.
Before we begin, it's important to note that a basic understanding of Three.js, GLSL, and shaders is required to follow this tutorial.
The Preparations
Creating the Sphere
First, you need to have a project with Three.js installed. If you don't have one, you can download my Three.js boilerplate.
Next, remove the helpers and remove the background color by commenting out or deleting this line:
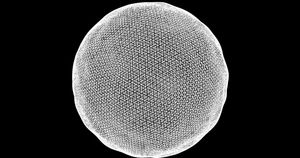
renderer.setClearColor(0xfefefe);Now, create a sphere using IcosahedronGeometry instead of SphereGeometry.
For the material, use an instance of ShaderMaterial and enable wireframe mode.
const mat = new THREE.ShaderMaterial({
  wireframe: true
});

const geo = new THREE.IcosahedronGeometry(4, 30);
const mesh = new THREE.Mesh(geo, mat);
scene.add(mesh);
Uniforms and Shaders
Now, add the following script tags for the vertex and fragment shaders to the index.html page.
<script id="vertexshader" type="vertex">
  void main() {
      gl_Position = projectionMatrix * modelViewMatrix * vec4(position, 1.0);
  }
</script>

<script id="fragmentshader" type="fragment">
  void main() {
      gl_FragColor = vec4(1.0);
  }
</script>
Next, we’ll need to link these shaders to the material.
const mat = new THREE.ShaderMaterial({
  wireframe: true,
  vertexShader: document.getElementById('vertexshader').textContent,
  fragmentShader: document.getElementById('fragmentshader').textContent,
});
By the end of this tutorial, we’ll be using six uniforms. Initially, we only need one: time, to animate the vertices of the icosahedron.
const uniforms = {
  u_time: { value: 0.0 }
};

const mat = new THREE.ShaderMaterial({
  wireframe: true,
  uniforms,
  vertexShader: document.getElementById('vertexshader').textContent,
  fragmentShader: document.getElementById('fragmentshader').textContent,
});
const clock = new THREE.Clock();
function animate() {
uniforms.u_time.value = clock.getElapsedTime();
renderer.render(scene, camera);
}So, to summarize what we’ve done so far, here is the full code:
index.html:
<!DOCTYPE html>
<html lang="en">
<head>
<meta charset="UTF-8" />
<meta http-equiv="X-UA-Compatible" content="IE=edge" />
<meta name="viewport" content="width=device-width, initial-scale=1.0" />
<title>Audio Visualizer - Wael Yasmina</title>
<style>
body {
margin: 0;
}
</style>
</head>
<body>
<script id="vertexshader" type="vertex">
void main() {
gl_Position = projectionMatrix * modelViewMatrix * vec4(position, 1.0);
}
</script>
<script id="fragmentshader" type="fragment">
void main() {
gl_FragColor = vec4(1.0);
}
</script>
<script src="/main.js" type="module"></script>
</body>
</html>main.js:
import * as THREE from 'three';
import { OrbitControls } from 'three/examples/jsm/controls/OrbitControls.js';
const renderer = new THREE.WebGLRenderer({ antialias: true });
renderer.setSize(window.innerWidth, window.innerHeight);
document.body.appendChild(renderer.domElement);
// Sets the color of the background.
// renderer.setClearColor(0xfefefe);
const scene = new THREE.Scene();
const camera = new THREE.PerspectiveCamera(
45,
window.innerWidth / window.innerHeight,
0.1,
1000
);
// Sets orbit control to move the camera around.
const orbit = new OrbitControls(camera, renderer.domElement);
// Camera positioning.
camera.position.set(6, 8, 14);
// Has to be done everytime we update the camera position.
orbit.update();
const uniforms = {
u_time: { value: 0.0 },
};
const mat = new THREE.ShaderMaterial({
wireframe: true,
uniforms,
vertexShader: document.getElementById('vertexshader').textContent,
fragmentShader: document.getElementById('fragmentshader').textContent,
});
const geo = new THREE.IcosahedronGeometry(4, 30);
const mesh = new THREE.Mesh(geo, mat);
scene.add(mesh);
const clock = new THREE.Clock();
function animate() {
  uniforms.u_time.value = clock.getElapsedTime();
  renderer.render(scene, camera);
}
renderer.setAnimationLoop(animate);
window.addEventListener('resize', function () {
camera.aspect = window.innerWidth / window.innerHeight;
camera.updateProjectionMatrix();
renderer.setSize(window.innerWidth, window.innerHeight);
});Turning the Sphere into an Animated Blob
In this section, we’ll animate the blob without using audio. To do this, we’ll need to incorporate time, as animation fundamentally relies on it.
Additionally, we need to incorporate Perlin Noise. But what is Perlin Noise, you might ask?
Perlin Noise is a gradient noise function used to create smooth, natural-looking randomness. It generates random values that are not widely dispersed from one another, resulting in a more coherent and fluid appearance.
If you’d like to learn more about this subject, I highly recommend watching this video from The Coding Train.
That said, GLSL lacks a built-in function for generating Perlin Noise values, so we'll either need to create one ourselves or borrow an existing implementation.
For this tutorial, there's no need to reinvent the wheel, so we'll go with the second option and use Ashima's webgl-noise.
Now, we’ll copy everything from the vec3 mod289() function to the vec3 fade() function and paste it into the vertex shader.
<script id="vertexshader" type="vertex">
  vec3 mod289(vec3 x)
  {
    return x - floor(x * (1.0 / 289.0)) * 289.0;
  }

  vec4 mod289(vec4 x)
  {
    return x - floor(x * (1.0 / 289.0)) * 289.0;
  }

  vec4 permute(vec4 x)
  {
    return mod289(((x*34.0)+10.0)*x);
  }

  vec4 taylorInvSqrt(vec4 r)
  {
    return 1.79284291400159 - 0.85373472095314 * r;
  }

  vec3 fade(vec3 t) {
    return t*t*t*(t*(t*6.0-15.0)+10.0);
  }

  void main() {
    gl_Position = projectionMatrix * modelViewMatrix * vec4(position, 1.0);
  }
</script>
Next, we have two variations of noise functions: cnoise() and pnoise(). Copy and paste the latter.
<script id="vertexshader" type="vertex">
  vec3 mod289(vec3 x)
  {
    return x - floor(x * (1.0 / 289.0)) * 289.0;
  }

  vec4 mod289(vec4 x)
  {
    return x - floor(x * (1.0 / 289.0)) * 289.0;
  }

  vec4 permute(vec4 x)
  {
    return mod289(((x*34.0)+10.0)*x);
  }

  vec4 taylorInvSqrt(vec4 r)
  {
    return 1.79284291400159 - 0.85373472095314 * r;
  }

  vec3 fade(vec3 t) {
    return t*t*t*(t*(t*6.0-15.0)+10.0);
  }

  float pnoise(vec3 P, vec3 rep)
  {
    vec3 Pi0 = mod(floor(P), rep); // Integer part, modulo period
    vec3 Pi1 = mod(Pi0 + vec3(1.0), rep); // Integer part + 1, mod period
    Pi0 = mod289(Pi0);
    Pi1 = mod289(Pi1);
    vec3 Pf0 = fract(P); // Fractional part for interpolation
    vec3 Pf1 = Pf0 - vec3(1.0); // Fractional part - 1.0
    vec4 ix = vec4(Pi0.x, Pi1.x, Pi0.x, Pi1.x);
    vec4 iy = vec4(Pi0.yy, Pi1.yy);
    vec4 iz0 = Pi0.zzzz;
    vec4 iz1 = Pi1.zzzz;

    vec4 ixy = permute(permute(ix) + iy);
    vec4 ixy0 = permute(ixy + iz0);
    vec4 ixy1 = permute(ixy + iz1);

    vec4 gx0 = ixy0 * (1.0 / 7.0);
    vec4 gy0 = fract(floor(gx0) * (1.0 / 7.0)) - 0.5;
    gx0 = fract(gx0);
    vec4 gz0 = vec4(0.5) - abs(gx0) - abs(gy0);
    vec4 sz0 = step(gz0, vec4(0.0));
    gx0 -= sz0 * (step(0.0, gx0) - 0.5);
    gy0 -= sz0 * (step(0.0, gy0) - 0.5);

    vec4 gx1 = ixy1 * (1.0 / 7.0);
    vec4 gy1 = fract(floor(gx1) * (1.0 / 7.0)) - 0.5;
    gx1 = fract(gx1);
    vec4 gz1 = vec4(0.5) - abs(gx1) - abs(gy1);
    vec4 sz1 = step(gz1, vec4(0.0));
    gx1 -= sz1 * (step(0.0, gx1) - 0.5);
    gy1 -= sz1 * (step(0.0, gy1) - 0.5);

    vec3 g000 = vec3(gx0.x,gy0.x,gz0.x);
    vec3 g100 = vec3(gx0.y,gy0.y,gz0.y);
    vec3 g010 = vec3(gx0.z,gy0.z,gz0.z);
    vec3 g110 = vec3(gx0.w,gy0.w,gz0.w);
    vec3 g001 = vec3(gx1.x,gy1.x,gz1.x);
    vec3 g101 = vec3(gx1.y,gy1.y,gz1.y);
    vec3 g011 = vec3(gx1.z,gy1.z,gz1.z);
    vec3 g111 = vec3(gx1.w,gy1.w,gz1.w);

    vec4 norm0 = taylorInvSqrt(vec4(dot(g000, g000), dot(g010, g010), dot(g100, g100), dot(g110, g110)));
    g000 *= norm0.x;
    g010 *= norm0.y;
    g100 *= norm0.z;
    g110 *= norm0.w;
    vec4 norm1 = taylorInvSqrt(vec4(dot(g001, g001), dot(g011, g011), dot(g101, g101), dot(g111, g111)));
    g001 *= norm1.x;
    g011 *= norm1.y;
    g101 *= norm1.z;
    g111 *= norm1.w;

    float n000 = dot(g000, Pf0);
    float n100 = dot(g100, vec3(Pf1.x, Pf0.yz));
    float n010 = dot(g010, vec3(Pf0.x, Pf1.y, Pf0.z));
    float n110 = dot(g110, vec3(Pf1.xy, Pf0.z));
    float n001 = dot(g001, vec3(Pf0.xy, Pf1.z));
    float n101 = dot(g101, vec3(Pf1.x, Pf0.y, Pf1.z));
    float n011 = dot(g011, vec3(Pf0.x, Pf1.yz));
    float n111 = dot(g111, Pf1);

    vec3 fade_xyz = fade(Pf0);
    vec4 n_z = mix(vec4(n000, n100, n010, n110), vec4(n001, n101, n011, n111), fade_xyz.z);
    vec2 n_yz = mix(n_z.xy, n_z.zw, fade_xyz.y);
    float n_xyz = mix(n_yz.x, n_yz.y, fade_xyz.x);
    return 2.2 * n_xyz;
  }

  void main() {
    gl_Position = projectionMatrix * modelViewMatrix * vec4(position, 1.0);
  }
</script>
With that done, in the vertex shader, we’ll call pnoise() to generate a random value. We’ll then use this value to calculate the amount of displacement for the current vertex.
void main() {
  float noise = pnoise(position, vec3(10.));
  float displacement = noise / 10.;

  gl_Position = projectionMatrix * modelViewMatrix * vec4(position, 1.0);
}
Next, we need to apply the displacement to the vertex, taking its normal into account—in other words, considering the direction of the vertex.
Additionally, we’ll use the new position value in the gl_Position calculation formula.
void main() {
  float noise = pnoise(position, vec3(10.));
  float displacement = noise / 10.;
  vec3 newPosition = position + normal * displacement;

  gl_Position = projectionMatrix * modelViewMatrix * vec4(newPosition, 1.0);
}
And now you should see your sphere becoming 'blobby'—woohoo!

To animate this, I’ll add time to the first argument of the noise generation function.
uniform float u_time;

void main() {
  float noise = pnoise(position + u_time, vec3(10.));

  float displacement = noise / 10.;
  vec3 newPosition = position + normal * displacement;
  gl_Position = projectionMatrix * modelViewMatrix * vec4(newPosition, 1.0);
}
To increase the roughness, multiply the generated value by an additional factor.
float noise = 5. * pnoise(position + u_time, vec3(10.));Using Audio Frequencies to Animate the Blob
First, place an audio file in the public folder of your project directory.
Next, we’ll load the file and play it when a click event is detected on the window, as browsers require a user interaction to trigger audio playback.
const listener = new THREE.AudioListener();
camera.add(listener);

const sound = new THREE.Audio(listener);

const audioLoader = new THREE.AudioLoader();
audioLoader.load('/track.mp3', function (buffer) {
  sound.setBuffer(buffer);
  window.addEventListener('click', function () {
    sound.play();
  });
});
With that done, we’ll now synchronize the animations with the beats using the AudioAnalyser feature in Three.js, which provides real-time frequency data from the audio input.
So, we’ll create an AudioAnalyser instance and pass the sound and the desired fftSize as arguments to the constructor.
const analyser = new THREE.AudioAnalyser(sound, 32);fftSize is a power of 2 ranging from 25 to 215. It is used in the algorithm that determines the frequencies.
Since we want to use the values returned by the analyzer to set the positions of the vertices, we’ll need to create a uniform to pass these values to the vertex shader.
const uniforms = {
  u_time: { value: 0.0 },
  u_frequency: { value: 0.0 },
};
Next, in the animate() function, we’ll update this property with the frequencies returned by the getAverageFrequency() method.
function animate() {
  uniforms.u_frequency.value = analyser.getAverageFrequency();

  uniforms.u_time.value = clock.getElapsedTime();
  renderer.render(scene, camera);
}
Now, we’ll create the uniform in the vertex shader and incorporate it into the displacement calculation.
uniform float u_frequency;

uniform float u_time;
void main() {
  float noise = 5. * pnoise(position + u_time, vec3(10.));

  float displacement = (u_frequency / 30.) * (noise / 10.);

  vec3 newPosition = position + normal * displacement;
  gl_Position = projectionMatrix * modelViewMatrix * vec4(newPosition, 1.0);
}
If the agitation level is too high, try lowering it by using a value less than 5.0 in the noise generation equation.
float noise = 3. * pnoise(position + u_time, vec3(10.));And that’s it for the vertex shader.
It's Time for Some Post-Processing
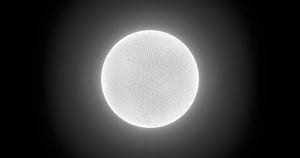
Now it’s time to add some glow using Unreal Bloom, which I’ve covered in detail in a dedicated article that explains the exact steps we’ll follow here. So if you’re not familiar with post-processing in Three.js, that article is definitely a must-read.
First, we’ll need to import the necessary modules.
import { EffectComposer } from 'three/examples/jsm/postprocessing/EffectComposer';
import { RenderPass } from 'three/examples/jsm/postprocessing/RenderPass';
import { UnrealBloomPass } from 'three/examples/jsm/postprocessing/UnrealBloomPass';
import { OutputPass } from 'three/examples/jsm/postprocessing/OutputPass';
Next, we’ll need to complete the following steps:
- Set the output color space;
- Create the passes;
- Create the composer;
- Add the passes;
- Use
requestAnimationFrame()instead ofsetAnimationLoop().
Step 1:
renderer.outputColorSpace = THREE.SRGBColorSpace;Step 2:
const renderScene = new RenderPass(scene, camera);

const bloomPass = new UnrealBloomPass(
  new THREE.Vector2(window.innerWidth, window.innerHeight)
);
bloomPass.threshold = 0.5;
bloomPass.strength = 0.4;
bloomPass.radius = 0.8;

const outputPass = new OutputPass();
Step 3:
const bloomComposer = new EffectComposer(renderer);Step 4:
bloomComposer.addPass(renderScene);
bloomComposer.addPass(bloomPass);
bloomComposer.addPass(outputPass);
Step 5:
function animate() {
  uniforms.u_time.value = clock.getElapsedTime();
  uniforms.u_frequency.value = analyser.getAverageFrequency();
  bloomComposer.render();
  requestAnimationFrame(animate);
}
animate();

window.addEventListener('resize', function () {
  camera.aspect = window.innerWidth / window.innerHeight;
  camera.updateProjectionMatrix();
  renderer.setSize(window.innerWidth, window.innerHeight);
  bloomComposer.setSize(window.innerWidth, window.innerHeight);
});
And this is how your visualizer should look at this point.

Controlling the Colors and Glow Properties
For this task, we'll use lil-gui, which has a dedicated section in my Three.js fundamentals tutorial. So, once again, I'll skip the details here.
Install the library and follow these steps:
- Import the library;
- Create the parameters object;
- Link the parameters to the properties you want to change;
- Create the UI elements.
Step 1:
import { GUI } from 'lil-gui';Step 2:
const params = {
  red: 1.0,
  green: 1.0,
  blue: 1.0,
  threshold: 0.5,
  strength: 0.4,
  radius: 0.8,
};
Step 3:
bloomPass.threshold = params.threshold;
bloomPass.strength = params.strength;
bloomPass.radius = params.radius;
const uniforms = {
u_time: { value: 0.0 },
u_frequency: { value: 0.0 },
u_red: { value: params.red },
u_green: { value: params.green },
u_blue: { value: params.blue },
};Step 4:
const gui = new GUI();

const colorsFolder = gui.addFolder('Colors');
colorsFolder.add(params, 'red', 0, 1).onChange(function (value) {
  uniforms.u_red.value = Number(value);
});
colorsFolder.add(params, 'green', 0, 1).onChange(function (value) {
  uniforms.u_green.value = Number(value);
});
colorsFolder.add(params, 'blue', 0, 1).onChange(function (value) {
  uniforms.u_blue.value = Number(value);
});

const bloomFolder = gui.addFolder('Bloom');
bloomFolder.add(params, 'threshold', 0, 1).onChange(function (value) {
  bloomPass.threshold = Number(value);
});
bloomFolder.add(params, 'strength', 0, 3).onChange(function (value) {
  bloomPass.strength = Number(value);
});
bloomFolder.add(params, 'radius', 0, 1).onChange(function (value) {
  bloomPass.radius = Number(value);
});
After completing the steps, you should be able to control the bloom but not the colors, right?
Well, that's because we created the uniforms to pass to the fragment shader but didn't use them yet. So let's do that now.
<script id="fragmentshader" type="fragment">
  uniform float u_red;
  uniform float u_blue;
  uniform float u_green;
  void main() {
      gl_FragColor = vec4(vec3(u_red, u_green, u_blue), 1. );
  }
</script>
Pretty cool, huh?
Finishing Up with a Cool Camera Effect
Guess what? This is also explained in another article, so we’ll just replicate the steps here.
Be sure to remove the OrbitControls before proceeding.
So, this first block of code will track the mouse position:
let mouseX = 0;
let mouseY = 0;
document.addEventListener('mousemove', function (e) {
  let windowHalfX = window.innerWidth / 2;
  let windowHalfY = window.innerHeight / 2;
  mouseX = (e.clientX - windowHalfX) / 100;
  mouseY = (e.clientY - windowHalfY) / 100;
});
Within the animate() function, we’ll use the second block of code to update the camera's position and direction.
function animate() {
  camera.position.x += (mouseX - camera.position.x) * 0.05;
  camera.position.y += (-mouseY - camera.position.y) * 0.5;
  camera.lookAt(scene.position);

  uniforms.u_time.value = clock.getElapsedTime();
  uniforms.u_frequency.value = analyser.getAverageFrequency();
  bloomComposer.render();
  requestAnimationFrame(animate);
}Conclusion
And that’s it for this tutorial. Now it’s up to you to experiment with different values, post-processing effects, and any other creative ideas you have.
Keep on hacking!
