React Three Fiber Tutorial for Beginners
Published on 24 Aug, 2024 | ~34 min read
If you're a React enthusiast looking to start your creative 3D journey, or even if you know just the basics, you're in the right place! By the end of this article, you'll have all the essential knowledge needed to create 3D experiences on your web pages using React Three Fiber.
By the way, don’t worry if you don’t have any prior experience with the standard Three.js library. As long as you know the basics of React, you're ready for this guide.
Before we begin, I suggest checking out this short read for a quick insight into WebGL/WebGPU and how these technologies relate to libraries like Three.js, React Three Fiber, Babylon.js, and Pixi.js.
And without further ado, let’s get started!
Installations
Create a new folder and open it in your editor (I’m assuming you're using VSCode), then open a new terminal.
In the terminal, type the following command: npm create vite@latest r3f-tutorial. Then, you'll be prompted with two lists: in the first, choose React; in the second, choose JavaScript.
This will create a new folder named r3f-tutorial. Now, open this folder in your editor the same way you did with its parent. Then, open a new terminal and type the following command: npm install to install the necessary dependencies.
Next, we need to install Three.js and React Three Fiber. To do this, type the following command: npm install three @react-three/fiber.
Now, run the command npm run dev to start the development server.
Once that's done, Vite will generate a link in the command line. Ctrl + Left-Click on it to open the app's page.

Now, make sure your main.jsx file looks exactly like this:
function App() {
    return (
      <div id='canvas-container'>
      {/* The magic happens here */}
      </div>
    )
}

export default App
Finally, open the index.css file and delete everything from it.
And with that done, we’re ready for the real fun!
The Pillars of Every React Three Fiber Application
Can you imagine life on Earth without water? The same principle applies to React Three Fiber applications and the following three components.
Coordinate System
We can’t discuss 3D—whether it's React Three Fiber or any other 3D software—without talking about the coordinate system.
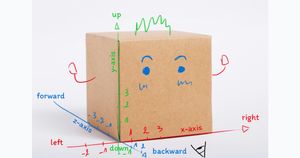
A coordinate system represents space using three axes: the x-axis for left and right, the y-axis for up and down, and the z-axis for forward and backward.
Although this concept is easy to understand and not something we implement ourselves, it is crucial to grasp before moving on.
Scene
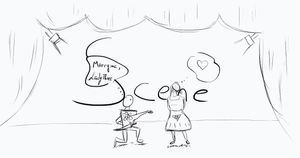
The scene is essentially a container for the visible components of the application.
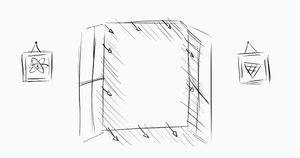
Camera
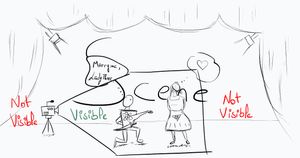
A scene without a camera is like a box with no way to look inside. It may contain interesting things, but they’re meaningless if we can’t see them, right?
Essentially, the camera is the component that allows us to see parts of a scene.
Creating Our First Scene
Can’t wait to start creating, huh? Let’s satisfy that urge by importing and using the <Canvas> component.
import { Canvas } from '@react-three/fiber';
function App() {
return (
<div id='canvas-container'>
<Canvas>
{/* The magic happens here actually */}
</Canvas>
</div>
);
}
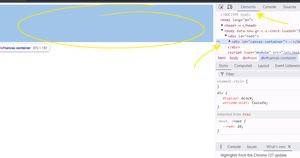
export default App;After saving, if you look at your page, you should see your first piece of art created with React Three Fiber. Congratulations!
But… are you kidding me? I only see a blank page!
No need to worry—the canvas is right there, ready for you to start adding elements. To confirm, press Ctrl + Shift + I to open the developer tools, go to the Elements tab, and hover over the canvas-container div. This will highlight the canvas.
To make the application take up the full window size, you should know that the canvas element, by default, takes up the full size of its container.
This means we need to use CSS to make the canvas-container div occupy the full space of the page. As a result, the canvas will take up the full size of that div, and thus the full size of the window. In fact, this is why we wrapped the Canvas component within a div in the first place.
In the index.css file, add the following snippet.
#canvas-container {
  width: 100vw;
  height: 100vh;
}
Even though we've made our canvas take up the full space on the page, you might still notice some unwanted extra scrolling space.
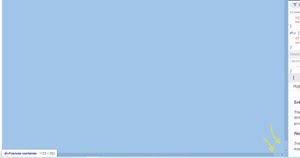
To get rid of that extra scrolling space, remove the margins from the <body> element.
body {
    margin: 0;
}

#canvas-container {
  width: 100vw;
  height: 100vh;
}
Meshes
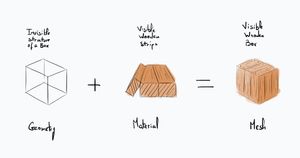
A mesh is a 3D object, whether it’s a simple shape like a box or sphere, or a complex model like a car or character created in Blender and loaded into the scene.
That said, a mesh is composed of two main elements: geometry and material.
In simple terms, the geometry defines the shape of an object, while the material determines what the object is made of.
Geometries
We have various geometries available that we can easily use to create meshes. In this tutorial, we’ll use two of them, starting with the sphere geometry.
Since a sphere is a mesh, we'll need to create a <mesh /> component. Within this component, we’ll use two other components to represent the geometry and the material.
function App() {
    return (
      <div id='canvas-container'>
        <Canvas>
          <mesh>
            <sphereGeometry />
            <meshBasicMaterial />
          </mesh>
        </Canvas>
      </div>
    );
  }
Creating a sphere doesn't stop there—we have a few properties we can tweak, like the size. To adjust the size, we use the args prop, which takes an array of constructor arguments.
In this case, the first argument/array element represents the size.
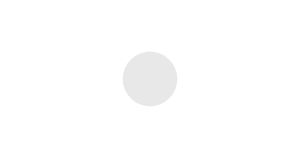
<sphereGeometry args={[3]} />This results in a large sphere. However, you’ll notice that it isn’t smoothly rounded.
To fix this, we need to add a couple more elements to the args array.
<sphereGeometry args={[3, 80, 80]} />Now your sphere looks smoothly rounded, but you might be wondering about those two 80s we just added, right?
In reality, every 3D object is made up of triangles. These triangles are formed by connecting segments.
The more segments a mesh has, the smoother it will appear. However, keep in mind that the more segments your objects have, the heavier the impact on your app's performance.
So, back to our sphere—the first 80 represents the number of width segments, and the second 80 represents the number of height segments.
To visualize the segments, add the wireframe prop to the material.
<meshBasicMaterial wireframe />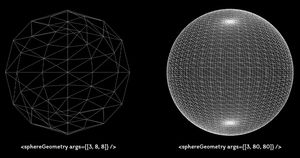
To create a box, we use the <boxGeometry /> component. The arguments are width, height, and depth, in that order.
<mesh>
    <boxGeometry args={[2, 3, 2]} />
    <meshBasicMaterial />
</mesh>
Materials
To change how our box is presented, we need to adjust its material properties, such as enabling wireframe mode (as we did with the sphere earlier) or changing the color of the box.
<meshBasicMaterial color='deepskyblue' />Or
<meshBasicMaterial color={0x00bfff} />There are many materials for different use cases, but a common factor among the majority of them is how they interact with light.
In the previous examples, we used the <meshBasicMaterial /> component, which is unique because it isn’t affected by light. Actually, I chose this material on purpose since we don’t have a light source in our scene yet.
That being said, let’s use the <meshPhongMaterial /> this time.
<mesh>
    <boxGeometry args={[2, 3, 2]} />
    <meshPhongMaterial />
</mesh>
With that done, you should now see a black rectangle regardless of the color you pass to the color prop. This is expected—after all, who can see the color of an object without any light?
Let’s add a light source. Add the line below, but don’t worry about the details just yet; there’s a dedicated section on lighting later in this article.
<Canvas>
    <mesh>
        <boxGeometry args={[2, 3, 2]} />
        <meshPhongMaterial color={0x00bfff} />
    </mesh>
    <directionalLight position={[2, 5, 1]} />
</Canvas>
Now the color of the box should be visible but darker than expected. This is because light affects how colors are perceived through shading and shadows.
To better see this effect, let’s change the camera’s position to adjust our view of the box.
In the <Canvas /> component, add the camera prop like this:
<Canvas camera={{ position: [2, 2, 2] }}>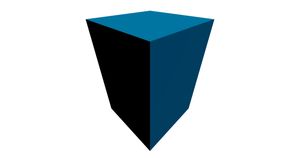
As mentioned, there are many materials, each suited for specific use cases. For example, <meshStandardMaterial /> is designed to look more realistic than <meshPhongMaterial />. There’s also <meshPhysicalMaterial />, which offers even greater realism with its reflection properties.
Note: more realistic materials require more computation and resources from the device running the application. Keep this in mind when choosing materials for your objects.
Looking for something special rather than realistic? Try using <meshToonMaterial />, which gives your objects a cartoonish look.
<Canvas>
    <mesh>
      <torusKnotGeometry args={[1.7, 0.3, 256, 256]} />
      <meshToonMaterial color={0x00bfff} />
    </mesh>
    <directionalLight position={[4, 2, 3]} />
</Canvas>
Geometric Transformations
Translation
When we talk about translation, we mean moving objects to a specific position. To achieve this, set the position prop on the mesh you want to move and pass an array of three values: the x, y, and z coordinates of the target position.
<mesh position={[-2, 2, -3]}>
    <torusKnotGeometry args={[1.7, 0.3, 256, 256]} />
    <meshToonMaterial color={0x00bfff} />
</mesh>
This moves the mesh two units to the left, two units up, and three units forward.
Scale
To change the size of a mesh, use the scale prop and pass an array of three values that define how much to scale the mesh along each axis.
<mesh position={[-2, 2, -3]} scale={[2, 0.5, 2]}>This doubles the size of the mesh along the x and z axes while halving its height.
Rotation
To rotate objects, there are several options available, but as a beginner, you'll mainly need the rotation prop. Like the previous props, this one takes an array of three values, each representing the amount of rotation along the x, y, and z axes.
Note: rotation values are in radians, not degrees
<mesh rotation={[Math.PI / 2, 0, 0]}>This rotates the mesh half a circle along the x-axis.
The Render Loop
The render loop, or animation loop, is one of the most fundamental concepts to understand if you want to animate objects in your scenes.
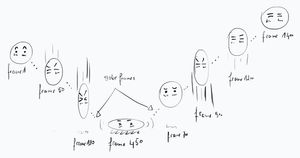
An animation is essentially a sequence of images, or frames, displayed at a specific frequency. This applies to any kind of animation you can think of, whether it’s a 3D application, a 2D game, a video, or a CSS animation.
That said, if we have a mesh and we want to animate it moving from one position to another, we need to display the mesh at various positions between the starting point and the endpoint over time.
This animation, like every animation, is achieved through the render loop.
Now, let’s see how this works by implementing an example.
First, instead of creating the <mesh /> directly inside the <Canvas />, we'll move it into a separate function.
import { Canvas } from '@react-three/fiber';

function AnimatedBox() {
  return (
    <mesh>
      <boxGeometry args={[2, 2, 2]} />
      <meshStandardMaterial color={0x00bfff} />
    </mesh>
  );
}

function App() {
  return (
    <div id='canvas-container'>
      <Canvas>
        <AnimatedBox />
        <directionalLight position={[4, 2, 3]} />
      </Canvas>
    </div>
  );
}

export default App;
Next, within this function, we’ll integrate the box animation into the render loop using a hook called useFrame().
First, we need to import the hook.
import { Canvas, useFrame } from '@react-three/fiber';Next, we'll use it within our component.
function AnimatedBox() {
    useFrame(() => {
        // Animation code
    });

    return (
        <mesh>
        <boxGeometry args={[2, 2, 2]} />
        <meshStandardMaterial color={0x00bfff} />
        </mesh>
    );
}
The useFrame() hook runs the code within the function we pass to it multiple times per second, depending on the device running the application. For example, on a 60Hz monitor, useFrame() will call the function 60 times per second.
For this animation, we’ll rotate the box over time. This means we’ll gradually increase the rotation values to animate the rotation, or decrease them for a reverse animation.
To achieve this, we need to access the box mesh within the function passed to the useFrame() hook. We'll use the useRef() hook to create a reference to the mesh.
First, we need to import the useRef() hook.
import { useRef } from 'react';Next, we’ll create a reference and set it to the mesh.
function AnimatedBox() {
    const boxRef = useRef();

    useFrame(() => {
      // Animation code
    });

    return (
      <mesh ref={boxRef}>
        <boxGeometry args={[2, 2, 2]} />
        <meshStandardMaterial color={0x00bfff} />
      </mesh>
    );
}
Finally, we can access the properties of our mesh through that reference. In our case, we'll increment the rotation values.
useFrame(() => {
    boxRef.current.rotation.x += 0.005;
    boxRef.current.rotation.y += 0.005;
    boxRef.current.rotation.z += 0.005;
});Camera Controls
Up until now, we've been adding objects to our scene, but we haven't had control over the view or the angles to observe these objects and the scene as a whole.
That being said, various modules are specifically designed for this, so we don't have to code them manually. And this brings us to Drei, a vast collection of ready-to-use components that can be effortlessly integrated into your applications.
So before we continue, click on the terminal, press Ctrl + C to stop the dev server, and then run the following command: npm install @react-three/drei
Next, run the server again, and let’s explore a couple of solutions for camera control.
FirstPersonControls
FirstPersonControls work like the camera controls in first-person shooter games, where the camera's perspective matches your own, and you move using the WASD or arrow keys. You can also use the mouse buttons to navigate the scene with FirstPersonControls.

First, import the FirstPersonControls module.
import { FirstPersonControls } from '@react-three/drei';Then, use the component inside the <Canvas />. And that’s literally it!
<Canvas>
  <FirstPersonControls />
  <AnimatedBox />
  <directionalLight position={[4, 2, 3]} />
</Canvas>
We have several options to tweak, such as adjusting the camera movement speed.
<FirstPersonControls movementSpeed={3} />You can also set the camera to move forward automatically. I’m not sure how useful that would be, but it’s there if you ever need it.
<FirstPersonControls movementSpeed={0.3} autoForward={true} />You can find the rest of the options on the FirstPersonControls documentation page.
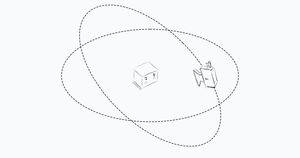
Orbit Controls
The OrbitControls, as its name suggests, allows you to orbit the camera around a certain point. It is actually one of the most commonly used camera controls.
So first, you have to import the module.
import { OrbitControls } from '@react-three/drei';Next, use the component inside the <Canvas />.
<Canvas>
  <OrbitControls />
  <AnimatedBox />
  <directionalLight position={[4, 2, 3]} />
</Canvas>
Then, you have various options to customize, such as enabling or disabling zooming, panning, or damping.
For more information about these and other types of camera controls, check out the documentation page on the official Drei documentation page.
Helpers and Gizmos
Helpers and gizmos are primarily debugging tools, but they can also be integral to the final product.
Helpers
There are various helpers to choose from, and in this article, I'll focus on just a couple. The first one is the <axesHelper />, which displays the axes of the scene's coordinate system.
<Canvas>
  <axesHelper />
  <OrbitControls />
  <AnimatedBox />
  <directionalLight position={[4, 2, 3]} />
</Canvas>
If your setup is similar to mine, you might not see the helper because it's covered by the box. You can either remove the box or increase the size of the axes by passing the new length as an array to the args prop.
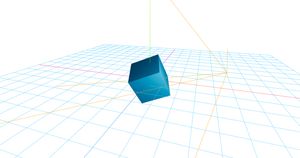
<axesHelper args={[10]} />The second helper we'll explore is the <gridHelper />, which is incredibly useful for guiding the placement of planes. It can also serve as a grid, which I'll demonstrate in a future article.
The <gridHelper /> component offers several options that can be passed to its args prop, such as adjusting the size to increase the grid's dimensions.
<gridHelper args={[20]} />The second option we can adjust is the number of divisions or squares that make up the grid.
<gridHelper args={[20, 20]} />The third element is the color of the main crossing axes, and the fourth is the color of the remaining segments.
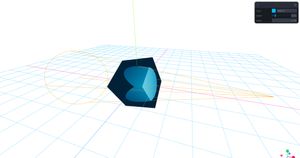
<gridHelper args={[20, 20, 0xff22aa, 0x55ccff]} />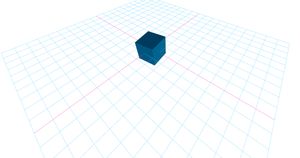
Gizmos
A gizmo acts like a compass for your application, helping you understand orientation and direction.
Drei provides two types of gizmos. If you haven’t installed Drei yet, do so now. Then, import the following modules:
import {
  OrbitControls,
  GizmoHelper,
  GizmoViewcube,
  GizmoViewport,
} from '@react-three/drei';
First, we need to use the <GizmoHelper>, which serves as a wrapper for the gizmo. This component allows us to specify the gizmo's placement using the alignment and margin props.
<Canvas>
  // Gizmo Wrapper
  <GizmoHelper alignment='bottom-right' margin={[80, 80]}>
    // The gizmo here
  </GizmoHelper>
  <gridHelper args={[20, 20, 0xff22aa, 0x55ccff]} />
  <OrbitControls />
  <AnimatedBox />
  <directionalLight position={[4, 2, 3]} />
</Canvas>
Inside the <GizmoHelper>, you can set one of the two types of gizmos. That’s all there is to it!
<GizmoHelper alignment='bottom-right' margin={[80, 80]}>
  <GizmoViewport />
</GizmoHelper>
Or
<GizmoHelper alignment='bottom-right' margin={[80, 80]}>
<GizmoViewcube />
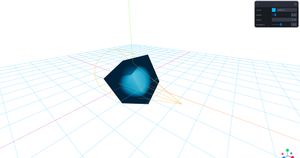
</GizmoHelper>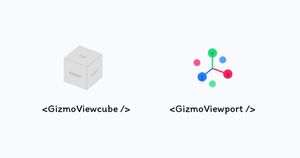
GUI
Debugging and testing values can be quite tedious and time-consuming. For this reason, having a graphical user interface (GUI) can be incredibly helpful.
That being said, there are a few excellent libraries available for this task, so there's no need to create one from scratch. The most common ones are dat.gui, Tweakpane, and Leva, which is the choice for this tutorial.
First things first, install the library using the following command: npm install leva@0.9.34
Note: I didn't install the latest version because it has an issue with the color picker.
Next, import the useControls hook.
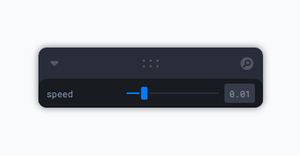
import { useControls } from 'leva';First, we’ll add a slider to our GUI to control the rotation speed of the box.
In the AnimatedBox() function, we'll use the useControls() hook to create a variable that holds the speed value.
const { speed } = useControls({
  speed: {
    value: 0.005,
    min: 0.0,
    max: 0.03,
    step: 0.001,
  },
});
The speed object with its four properties represents the slider. The keys are self-explanatory: value is the initial value, min and max define the minimum and maximum values of the slider, and step specifies the increment between values.
Now, while the GUI will be displayed in the application, it won't affect the box's animation speed because we haven't linked the GUI values to the rotation values. So let's do that.
const { speed } = useControls({
  speed: {
    value: 0.005,
    min: 0.0,
    max: 0.03,
    step: 0.001,
  },
});

useFrame(() => {
  boxRef.current.rotation.x += speed;
  boxRef.current.rotation.y += speed;
  boxRef.current.rotation.z += speed;
});
Now, if you try to adjust the speed, it should work as expected.
We can also add a color picker to the GUI to change the color of the box.
To do this, we'll create a color variable using the useControls() hook and pass an initial value as the hexadecimal representation of the color.
const { color, speed } = useControls({
  color: '#00bfff',
  speed: {
    value: 0.005,
    min: 0.0,
    max: 0.03,
    step: 0.001,
  },
});
Next, we'll pass the color variable to the color prop of the material used to create the box mesh.
<meshStandardMaterial color={color} />Lights
Just like in real life, a React Three Fiber has different types of lights. In this tutorial, we're going to explore four of the most commonly used ones.
AmbientLight
AmbientLight simulates the light that comes from the environment, such as sunlight filtering into a room, the soft glow of streetlights, or even the diffused light from overcast skies.

What I want you to do now is replace the <directionalLight /> we've been using since the beginning of the article with <ambientLight />.
Note: you can have multiple light sources of different types in one scene. I just want you to see the effect of <ambientLight /> without any other light sources.
<ambientLight />When you do that, you’ll notice the scene becomes overly bright. To fix this, we need to reduce the light intensity and slightly darken its color.
<ambientLight color={0xfcfcfc} intensity={0.2} />DirectionalLight
Directional light is a light source that emits a broad stream of light, similar to sunlight or the illumination in a room on a sunny day where the only light source is a window.
To add a directional light we can do it the same way we did it earlier.
Additionally, we can control both the intensity and color of the light.
<directionalLight
position={[4, 2, 3]}
color={0xffea00}
intensity={0.8}
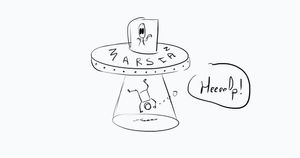
/>SpotLight
This light source is defined by the cone shape it forms. Examples from real life include stage lights in a theatre, spotlights in architectural designs, and light emitted from UFOs to abduct people... cough cough.
To add a spotlight, simply use the <spotLight /> component. Note that the intensity prop is essential; without it, the spotlight won’t be visible!
<spotLight intensity={50} position={[4, 2, 3]} />We can adjust the light properties, but doing so without a helper can be quite challenging.
So to add a light helper, follow these steps.
First, create a new component that returns a light component. Do not add the light directly to the <Canvas>.
function LightWithHelper() {
  return <spotLight intensity={50} position={[4, 2, 3]} />;
}
When you add the <LightWithHelper /> component to the <Canvas>, nothing should change visually.
So, what we're going to do now is import the useHelper() hook from Drei and the SpotLightHelper from Three.js.
import {
  OrbitControls,
  GizmoHelper,
  GizmoViewport,
  useHelper,
} from '@react-three/drei';
import { SpotLightHelper } from 'three';
Next, we'll create a reference to the light within the component using the useRef() hook.
function LightWithHelper() {
  const light = useRef();

  return (
    <spotLight
      ref={light}
      intensity={50}
      position={[4, 2, 3]}
    />
  );
}
The last step is to use the useHelper() hook we just imported. It takes three arguments: the reference to the light, the SpotLightHelper class, and a color. And with this, you should be able to see the helper.
function LightWithHelper() {
  const light = useRef();

  useHelper(light, SpotLightHelper, 'orange');

  return (
    <spotLight
      ref={light}
      intensity={50}
      position={[4, 2, 3]}
    />
  );
}
Now you can, for example, change the radius of the spot created by the light using the angle prop.
<spotLight
  ref={light}
  intensity={50}
  position={[4, 2, 3]}
  angle={Math.PI / 8}
/>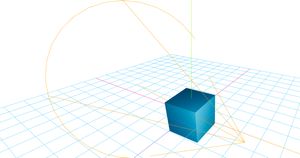
As you can see, the circle created by the helper is a great indicator to help you adjust the right radius. However, we can make the task even easier by using the GUI to set the angle values!
function LightWithHelper() {
  const light = useRef();

  useHelper(light, SpotLightHelper, 'orange');

  const { angle } = useControls({
    angle: Math.PI / 8,
  });

  return (
    <spotLight
    ref={light}
    intensity={50}
    position={[4, 2, 3]}
    angle={angle}
    />
  );
}
Another property we can tweak is the penumbra, which controls the blurriness of the edges of the spotlight.
function LightWithHelper() {
  const light = useRef();

  useHelper(light, SpotLightHelper, 'orange');

  const { angle, penumbra } = useControls({
    angle: Math.PI / 8,
    penumbra: {
      value: 0.0,
      min: 0.0,
      max: 1.0,
      step: 0.1,
    },
  });

  return (
    <spotLight
      ref={light}
      intensity={50}
      position={[4, 2, 3]}
      angle={angle}
      penumbra={penumbra}
    />
  );
}
PointLight
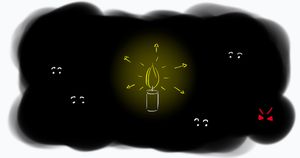
PointLight is a source of light that emits light uniformly in all directions. Examples include campfires, light bulbs, and candlelight.
To create a PointLight, add a <pointLight /> component within the <Canvas> and be sure to set the intensity.
<pointLight intensity={50} position={[4, 2, 3]} />Shadows
We can't talk about light without mentioning shadows.
Adding shadows in React Three Fiber is quite simple. We just need to enable shadows in the <Canvas> and specify which components are shadow casters and which are shadow receivers.
To activate shadows, we need to add the shadows prop to the <Canvas>.
<Canvas shadows>The shadow casters are the light and the box, so we'll add the castShadow prop to both.
<spotLight
  ref={light}
  intensity={50}
  position={[5, 8, 0]}
  angle={angle}
  penumbra={penumbra}
  castShadow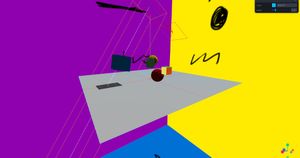
><mesh ref={boxRef} position={[0, 3, 0]} castShadow>Next, we'll create a plane to visualize the shadow cast by the box. And, of course, we'll set the receiveShadow prop on the mesh.
By the way, create the plane directly in the <Canvas>; there's no need to create a new function.
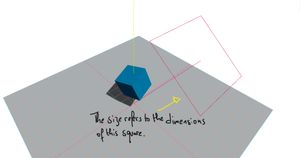
<mesh rotation={[-Math.PI / 2, 0, 0]} receiveShadow>
  <planeGeometry args={[20, 20]} />
  <meshStandardMaterial />
</mesh>
And with that done, you should be able to see the shadow of the box on the plan
Now, there's a problem you're likely to encounter with shadows during your journey as a React Three Fiber developer.
To demonstrate this, we'll first replace the spotlight with a directional light. We'll create a new component that returns the directional light along with a helper.
Just as we did with the spotlight earlier, we'll import the helper specifically designed for the directional light.
import { SpotLightHelper, DirectionalLightHelper } from 'three';Next, we'll create a function named DirectionalLightWithHelper that returns a <directionalLight /> component.
function DirectionalLightWithHelper() {
  const light = useRef();
  useHelper(light, DirectionalLightHelper, 2, 'crimson');

  return (
    <directionalLight
      ref={light}
      position={[5, 8, 0]}
      castShadow
    />
  );
}
Then add it to the <Canvas> instead of the <LightWithHelper /> component we created in the previous section.
<DirectionalLightWithHelper />Notice how I passed four arguments this time to the useHelper() hook. Most importantly, the new argument, which specifies the size of the helper, is added before the color. Don't make the same mistake I did by forgetting this argument—it literally took me hours to figure out where the error message was coming from!
Now, set the position of the light to [-5, 8, 0] and the position of the box to [5, 8, 0].
<directionalLight
  ref={light}
  position={[-5, 8, 0]}
  castShadow
/><mesh ref={boxRef} position={[5, 3, 0]} castShadow>
<boxGeometry args={[2, 2, 2]} />
<meshStandardMaterial color={color} />
</mesh>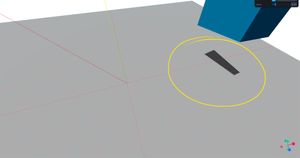
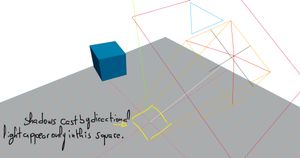
As you can see, most of the box shadow is now missing! But why?
Well, lights actually have defined areas where their shadows appear, and sometimes these shadows extend beyond these areas.
By changing the positions of the light and the box, we found ourselves in a situation where the shadow area was not large enough to encompass the entire shadow.
That being said, to visualize the area of the shadow cast by our light, we need to use a different helper.
So the first thing we're going to do is import the CameraHelper class from Three.js
import { SpotLightHelper, DirectionalLightHelper, CameraHelper } from 'three';Next, we need to transform the <directionalLight /> component returned by the DirectionalLightWithHelper() function into a wrapper component.
<directionalLight
  ref={light}
  position={[-5, 8, 0]}
  castShadow
>
</directionalLight>
Next, within the <directionalLight> component, we’re going to create an orthographic camera.
In React Three Fiber, there are several types of cameras. One of them is the orthographic camera, which is defined by four edges: top, right, bottom, and left.
<directionalLight
  ref={light}
  position={[-5, 8, 0]}
  castShadow
>
  <orthographicCamera attach='shadow-camera' />
</directionalLight>
You not only added a new camera for an unknown reason but also a new prop with an unknown value. Like, come on, man!
Yes, I know it’s a lot all of a sudden, but here’s the explanation.
Cameras in React Three Fiber are not only used to display the scene but also to calculate the areas where shadows cast by lights should appear. For example, DirectionalLight uses an orthographic camera for this purpose.
With that said, an orthographic camera has a helper that displays the area it captures. Consequently, we leveraged this by attaching the camera to the light’s shadow and using the helper to show the area covered by the shadow.
To better understand this, imagine the shadow as a person. We’ve given this person a camera or a laser tool to show us the area they can see. This area is where the shadow will appear.
That’s the first part. Now, in standard Three.js, we typically create an object and then attach it to a parent object. Similarly, to use a camera, we need to create it and then attach it to the scene.
In React Three Fiber, this kind of setup is handled automatically. If you recall from the second section, I mentioned that the camera is one of the most essential parts of a React Three Fiber application, yet we didn’t create one. Why? Because it was created and attached to the scene automatically!
In our case, instead of adding the orthographic camera directly to the scene, we want to attach it to the shadow. We do this using the attach prop and setting its value to 'shadow-camera'.
Now, to display the helper, we’ll create a new reference, call the useHelper() hook while passing the reference and CameraHelper as arguments, and then set the reference to the camera. All of this should be familiar to you at this point.
function DirectionalLightWithHelper() {
  const light = useRef();
  useHelper(light, DirectionalLightHelper, 2, 'crimson');

  const shadow = useRef();
  useHelper(shadow, CameraHelper);

  return (
    <directionalLight
    ref={light}
    position={[-5, 8, 0]}
    castShadow>
      <orthographicCamera
        attach='shadow-camera'
        ref={shadow}
        args={[-2, 2, 2, -2]}
      />
    </directionalLight>
  );
}Once that’s done, you should be able to see the helper. However, the shadow is completely disappeared because attaching the camera reset the shadow area.
Now we have full control over the shadow area. So to adjust its size so it encompasses the box, you can pass the edge values as an array to the args prop or set each edge individually using its respective prop.
<directionalLight
  ref={light}
  position={[-5, 8, 0]}
  castShadow
>
  <orthographicCamera
    attach='shadow-camera'
    ref={shadow}
    left={-2}
    right={2}
    top={8}
    bottom={4}
  />
</directionalLight>
Same as:
<directionalLight
ref={light}
position={[-5, 8, 0]}
castShadow
>
  <orthographicCamera
    attach='shadow-camera'
    ref={shadow}
    args={[-2, 2, 8, 4]}
  />
</directionalLight>Loading Models
They say a picture is worth a thousand words. In the context of 3D, a model is worth just as much.
That said, loading models into a scene in React Three Fiber is a piece of cake. Just follow the next few steps.
First and foremost, download a .glb or .gltf file and place it in the public folder of your project directory.
Next, we have two methods for loading our file. The first is using the useLoader() hook from React Three Fiber along with the GLTFLoader from Three.js examples.
import { Canvas, useFrame, useLoader } from '@react-three/fiber';
import { GLTFLoader } from 'three/examples/jsm/loaders/GLTFLoader';
The next step is to create a new component in which we'll load the model. Inside this component, we'll call the useLoader() hook, which takes two arguments: the first is the type of file loader we want to use (in our case, the GLTFLoader), and the second is the path to the file.
function Model() {
  const result = useLoader(GLTFLoader, '/Cthulhu.gltf');
}
The second method involves using only the useGLTF() hook from Drei. To do this, import the hook, call it, and pass the path to the file as an argument.
import {
  OrbitControls,
  GizmoHelper,
  GizmoViewport,
  useHelper,
  useGLTF,
} from '@react-three/drei';
function Model2() {
const result = useGLTF('/Chicken.gltf');
}The remaining steps are identical for both methods.
Before we proceed to the next step, we need to understand something important: the <primitive /> component.
Most objects in React Three Fiber are represented by corresponding components. For example, a mesh is represented by the <mesh> component, a geometry like a box is represented by the <boxGeometry /> component, and similarly for materials, lights, helpers, and so on.
However, some objects don't fall under this rule, and models are one of these exceptions.
For these types of objects, we need to use the <primitive /> component. So, you create a obejct prop, and React Three Fiber will handle rendering it in the scene. Pretty cool, huh?
function Model() {
  const result = useLoader(GLTFLoader, '/Cthulhu.gltf');
  return <primitive object={result.scene} />;
}
function Model2() {
const result = useGLTF('/Chicken.gltf');
return <primitive object={result.scene} />;
}Now, we simply add the <Model /> component to the <Canvas>.
// In the Canvas
<Model />
// In the Canvas
<Model2 />You can apply geometric transformations to your model through the corresponding props in the <primitive /> component, not in the <Model /> component.
return <primitive object={result.scene} position={[0, 2, 0]} />;Textures
Applying Textures to Meshes
To apply textures to your objects, there are two methods. The first is using the useLoader() hook that we imported earlier, along with the TextureLoader module from Three.js.
So, let's start by importing the TextureLoader.
By the way, make sure you have the textures you want to use in the public folder.
import {
  SpotLightHelper,
  DirectionalLightHelper,
  CameraHelper,
  TextureLoader,
} from 'three';
Next, we'll create a new component that returns a sphere to which we'll apply the texture. Within this component, we'll call the useLoader() hook, passing the TextureLoader and the path to the image file as arguments.
function SphereWithTexture() {
  const texture = useLoader(TextureLoader, '/texture 1.jpg');

  return (
    <mesh position={[-2, 3, 2]}>
      <sphereGeometry />
      <meshStandardMaterial />
    </mesh>
  );
}
Then, we'll pass the texture to the map prop of the material. And of course, don't forget to add the component to the <Canvas>.
<meshStandardMaterial map={texture} />// In the Canvas
<SphereWithTexture />The second method involves using the useTexture() hook from Drei, which eliminates the need to import the TextureLoader module.
import {
  OrbitControls,
  GizmoHelper,
  GizmoViewport,
  useHelper,
  useGLTF,
  useTexture,
} from '@react-three/drei';
function SphereWithTexture2() {
const texture = useTexture('/texture 2.jpg');
return (
<mesh position={[0, 1, -2]}>
<sphereGeometry />
<meshStandardMaterial map={texture} />
</mesh>
);
}// In the Canvas
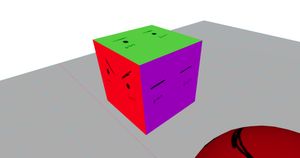
<SphereWithTexture2 />We can apply different materials with different textures to boxes. Instead of loading just one texture, we'll load six. Similarly, instead of using a single material component within the mesh, we'll use six.
function BoxWithTexture() {
  const texture1 = useTexture('/texture 1.jpg');
  const texture2 = useTexture('/texture 2.jpg');
  const texture3 = useTexture('/texture 3.jpg');
  const texture4 = useTexture('/texture 4.jpg');
  const texture5 = useTexture('/texture 5.jpg');
  const texture6 = useTexture('/texture 6.jpg');

  return (
    <mesh position={[0, 2, -4]}>
      <boxGeometry />
      <meshBasicMaterial attach='material-0' map={texture1} />
      <meshBasicMaterial attach='material-1' map={texture2} />
      <meshBasicMaterial attach='material-2' map={texture3} />
      <meshBasicMaterial attach='material-3' map={texture4} />
      <meshBasicMaterial attach='material-4' map={texture5} />
      <meshBasicMaterial attach='material-5' map={texture6} />
    </mesh>
  );
}
// In the Canvas
<BoxWithTexture />As you can see, I added the attach prop to attach the material components to the specific materials of the mesh object. We did something similar earlier in the shadows section—remember?
Applying Textures to the Scene
To change the properties of the scene in general, we need to use the useThree() hook. So, let’s start by importing it.
import {
  Canvas,
  useFrame,
  useLoader,
  useThree
} from '@react-three/fiber';
Next, we’ll create a component focused on changing the background of the scene.
function UpdateSceneBackground() {
  // This component doesn't return anything
  return null;
}
// Don't forget to add the component to the Canvas
<UpdateSceneBackground />The useThree() hook actually returns more than just the scene. However, in our case, we’ll focus on extracting and using only the scene object.
function UpdateSceneBackground() {
  const { scene } = useThree();

  return null;
}
Before applying a texture, let’s start by changing the background color of the scene.
To do that, we need to import the Color class from the core of Three.js. Then, pass an instance of it with the desired color name to the background property of the scene.
import {
  SpotLightHelper,
  DirectionalLightHelper,
  CameraHelper,
  TextureLoader,
  Color,
} from 'three';
function UpdateSceneBackground() {
const { scene } = useThree();
scene.background = new Color('black');
return null;
}And boom, your background is now darker than the night sky!
Now it's time for some textures. The background property doesn't just accept Color instances; it also accepts textures.
function UpdateSceneBackground() {
  const { scene } = useThree();

  const texture = useLoader(TextureLoader, '/stars.jpg');

  scene.background = texture;

  return null;
}
With that done, you'll see the texture applied, but it will likely appear brighter than expected. This isn’t due to the lighting but because the color space hasn’t been set.
To set the color space of the texture, import the SRGBColorSpace module from the core of Three.js. Then, assign it to the colorSpace property.
import {
  SpotLightHelper,
  DirectionalLightHelper,
  CameraHelper,
  TextureLoader,
  Color,
  SRGBColorSpace,
} from 'three';
const texture = useLoader(TextureLoader, '/stars.jpg');
texture.colorSpace = SRGBColorSpace;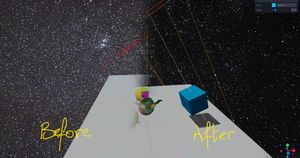
Hold on, yes, the texture now looks better, but I have no idea what this color space is. Any insights on this?
Well, this topic is explained in detail in this article. So open it in another tab, and let's continue our work, shall we?
The fun doesn't stop here. The scene is actually a cube, which has six faces, meaning we can apply a different texture to each face.
To do this, we need a special type of texture called a cube texture. It consists of six textures, one for each face of the cube.
Again, we have two methods to create this type of texture. The first is to use the useLoader() hook and import the CubeTextureLoader module from Three.js. Then, pass the loaded texture to the background property of the scene.
import {
  SpotLightHelper,
  DirectionalLightHelper,
  CameraHelper,
  TextureLoader,
  Color,
  SRGBColorSpace,
  CubeTextureLoader,
} from 'three';
function UpdateSceneBackground() {
const { scene } = useThree();
const [texture] = useLoader(CubeTextureLoader, [
[
'/texture 1.jpg',
'/texture 2.jpg',
'/texture 3.jpg',
'/texture 4.jpg',
'/texture 5.jpg',
'/texture 6.jpg',
],
]);
scene.background = texture;
return null;
}The second option is to import and use the useCubeTexture() hook from Drei.
useCubeTexture() takes two arguments: the first is an array of file names, and the second is an object specifying the path to these files.
function UpdateSceneBackground() {
  const { scene } = useThree();

  const texture = useCubeTexture(
    [
      'texture 1.jpg',
      'texture 2.jpg',
      'texture 3.jpg',
      'texture 4.jpg',
      'texture 5.jpg',
      'texture 6.jpg',
    ],
    { path: '' }
  );

  scene.background = texture;

  return null;
}
Events
Raycasting, or picking objects from the scene, is one of the easiest tasks in React Three Fiber. In fact, you might not fully appreciate how easy it is until you compare it to doing the same in standard Three.js!
In React Three Fiber, we have a wide range of events, from mouse click and hover to double-click and more. All we need to do is attach these events to objects and specify what should happen when the event is triggered. It's very similar to handling events in Vanilla JavaScript.
Here's an example. Let’s say we want to toggle the wireframe mode of the box when it gets clicked.
First, we’ll use state to check whether the wireframe mode is active or not.
import { useRef, useState } from 'react';// Within AnimatedBox()
const [wireframe, setWireframe] = useState(false);Next, we’ll define a handler function to toggle the state and pass this state to the wireframe prop of the material.
// Within AnimatedBox()

const [wireframe, setWireframe] = useState(false);
// Handle click event to toggle the wireframe mode
const handleClick = () => {
setWireframe(wireframe === false ? true : false);
};
//...
<meshStandardMaterial color={color} wireframe={wireframe} />Finally, we’ll assign the onClick event to the mesh.
<mesh
  ref={boxRef}
  position={[5, 3, 0]}
  castShadow
  onClick={handleClick}
>Conclusion
And that wraps up this article! I hope I was able to smooth out your initial experience with React Three Fiber and, most importantly, make it both enjoyable and fun.
As you continue to explore and create with React Three Fiber, remember that experimentation is key. The world of 3D graphics is vast and exciting, so keep pushing your boundaries and have fun with your projects!

Resources
- React Three Fiber documentation
- Drei documentation
- Leva documentation
- Three.js documentation
- Shadow Camera Helper?
- React three fiber directional light don’t cast proper shadow
- How to use directionLightHelper in react/three-fiber?
- CubeTextureLoader can't be used with useLoader